Last updated on September 24, 2023
Reading Time: 8 minutesIntroduction
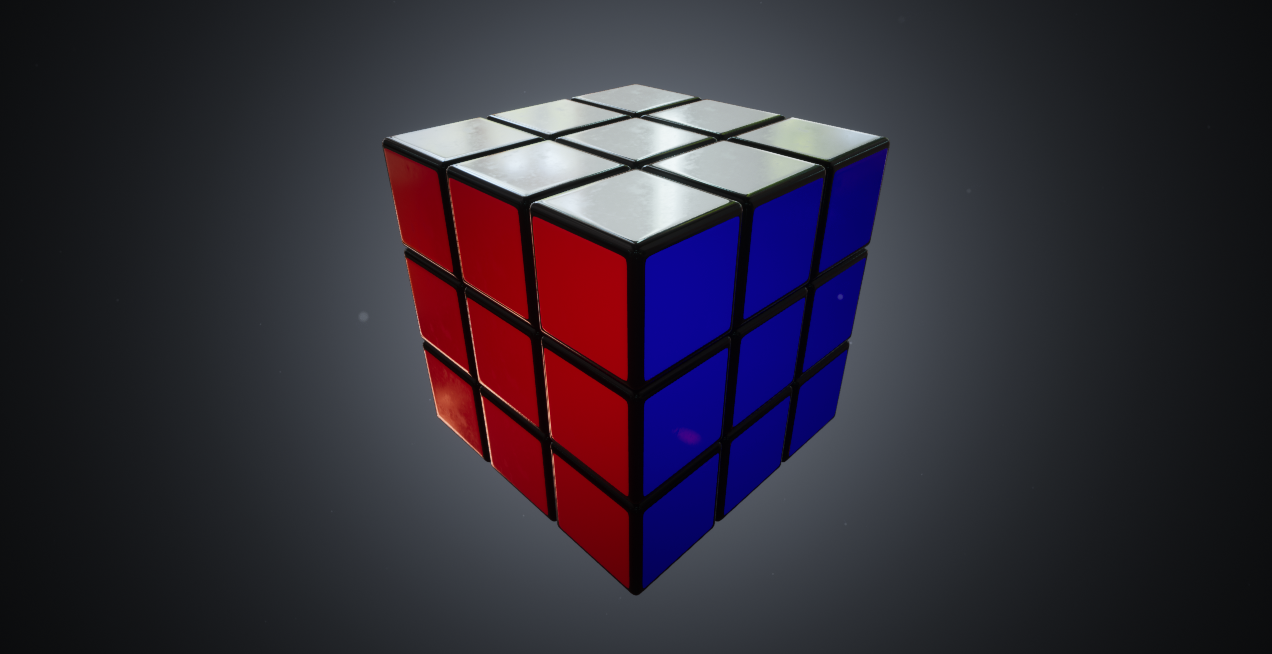
Recently, I came across an awesome plugin called Fresh Cooked Tweens (FCTween). It’s an open-source tweening library for Unreal Engine by Jared Cook. So, I decided to give it a try by using an old project as a base that I did back in 2015 (when I started using Unreal Engine for the first time). It was a simple Rubik’s Cube game made in C++. The idea was just to get used to C++ in Unreal Engine.
I’m not going to go into details about every single thing in the game. However, I will try to highlight a few changes I made, how I incorporated the FCTween plugin into it, and a few tricks that might be useful for newcomers to Unreal.
The full source code can be downloaded from: https://github.com/valentegamedev/ue5-rubiks-cube.git
If you want to play/test the game, it is also available on my itch.io page here.
Tweening
In game development, tweening libraries are essential for creating smooth and seamless animations and transitions. Tweening, short for “in-betweening“, refers to creating intermediate frames between two keyframes to create the illusion of motion.
Tweening libraries are indispensable for game developers, providing a quick, efficient, and highly customizable way to create smooth, engaging animations and transitions. They offer a variety of easing functions, which determine the acceleration and deceleration of the motion, as well as the ability to chain tweens together and create complex animation sequences.
If you want to know more about how easing functions behave. Please, check this excellent project, the easing.net website. The source code is also available here.
At first, I used iTween for Unreal Engine, a port of the iTween plugin for Unity to Unreal by Jared Therriault. It was the only open-source tweening library that I found at that time (2015).
Nowadays, I also know BUITween and, recently, FCTween. The first one it’s very easy to use; however, it only supports tweening for UMG (Unreal Motion Graphics). More specifically, the FCTween, it’s a lightweight tweening library that is simple and straightforward to use and can be adapted easily to our needs due to the lambda expressions approach. You can check the author’s post here for more details on how to use it.
To learn more about lambda in Unreal, I highly recommend this short tutorial from Orfeas Eleftheriou.
Rotating Cube Pieces
There are many ways to accomplish the animation to rotate the Rubik’s cube pieces together by code. As an Unreal developer, the first thing that should come to mind would be to use Timelines or Timers.
Timelines are very easy to use in blueprints; however, you need some extra steps to work with them in C++, as you can see in this tutorial by Orfeas Eleftheriou.
Timers are easy also; however, as Timelines, you would need extra work to make the animations and would also demand extra work to make something reusable. There is also a very good tutorial about Timers from Tom Looman here.
In Unreal, a node called MoveComponentTo (UKismetSystemLibrary:: MoveComponentTo in C++) can interpolate/tween a component to the specified relative location and rotation over a specified time in seconds. However, the easing options are very limited, and it will only interpolate/tween the location and rotation.
Even though both can get the job done, a tweening library makes it way easier and more straightforward.
For example, for the Rubiks game, I wanted to animate the RotatorSceneComponent (a “dummy” scene component that works as a pivot for all the pieces that will rotate) by rotating it from 0 to 90 degrees around one of the axis in 0.4 seconds. To accomplish this with FCTween, I just had to do something like this:
...
FCTween::Play(
	FRotator(0, 0, 0).Quaternion(), //Start
	Rotation.Quaternion(), //End
	[&](FQuat t) //Update function
	{
		RotatorSceneComponent->SetWorldRotation(t.Rotator());
	},
	Speed, //Speed = 0.4f
	EFCEase::Linear); //Easing function
...
The results are quite impressive for a few lines of code. However, if we check the easing function in the code example above, it uses the linear function, and I think it’s quite boring. So, if we check the easing.net website, the OutBack easing function looks nice for the rotation. It will speed up to the target, go over the limit a little, and come back to the target:

To add this behavior to the rotation, we just need to change the last parameter (easing function):
...
FCTween::Play(
	FRotator(0, 0, 0).Quaternion(), //Start
	Rotation.Quaternion(), //End
	[&](FQuat t) //Update Function
	{
		RotatorSceneComponent->SetWorldRotation(t.Rotator());
	},
	Speed, //Speed = 0.4f
	EFCEase::OutBack); //Easing function
...
Then, we get this:
Much better, right?
Another thing that I needed is to know whenever the animation finishes to enable, once again the user interaction, notify the steps and check if the cube is solved. To do that, we can easily add an OnComplete event (a lambda expression that will be trigged just when the tween finishes) to the current tween like this:
//I simplified the code a bit, so it's easier to follow
...
FCTween::Play(
	FRotator(0, 0, 0).Quaternion(), //Start
	Rotation.Quaternion(), //End
	[&](FQuat t) //Update Function
	{
		RotatorSceneComponent->SetWorldRotation(t.Rotator());
	},
	Speed, //Speed = 0.4f
	EFCEase::OutBack)->SetOnComplete([&]() {
		bIsAnimating = false;
		bIsInteractionEnabled = true;

		OnCubeChanged.Broadcast(GetSteps());

		if(IsCubeSolved())
		{
			OnCubeSolved.Broadcast();
		}
	});
...
That’s handy, right? I’ve also added a scaling-down animation whenever the size of the cube changes:
...
FCTween::Play(
	1.05f, //Start
	1.0f, //End
	[&](float t)
	{
		SetActorScale3D(FVector::OneVector * t);
	},
	0.3f, //Speed
	EFCEase::OutBack); //Easing function
...
The new Enhanced Input plugin
Recently, Epic Games released the Enhanced Input. It’s the new input system that is provided as a plugin within Unreal 5. With the release of Unreal 5.1, the old input system is deprecated, and Enhanced Input is enabled by default. If you try to use the old “Action and Axis” mappings, you might see this warning in the engine:

You can find an extensive and detailed explanation by Epic Games about the new Enhanced Input system here.
Also, if you want to work with it in C++, you must add the EnhancedInput module to your Build.cs file. You can check it at Source/RubiksCube/RubiksCube.Build.cs in this project.
So, I didn’t do anything fancy with the new system. However, I managed to easily remove and disable tick for the game by adapting it to the new input system. The original solution was very “ticky” (I know! It shouldn’t! :P).
I mainly cleaned up the code and splitted the tick code into two parts. One for whenever I hold the left mouse button and the other whenever I release the left mouse button. The first, will trigger the LineTrace to look for the cube pieces and detect the swipe direction, and the second will reset the interaction state.
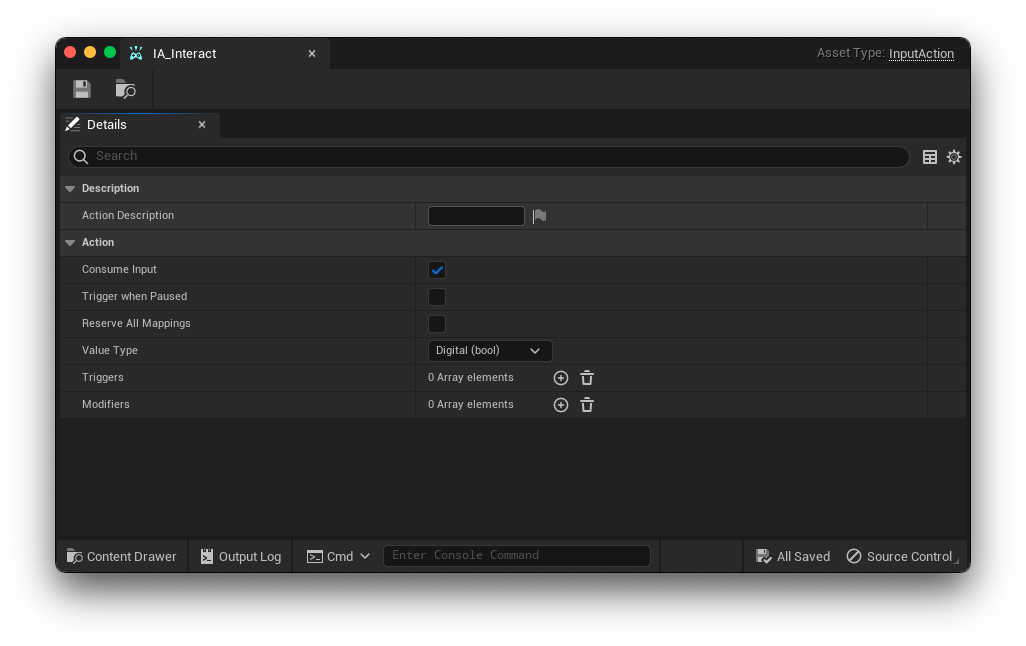
For that, I created an InputAction called IA_Interact:
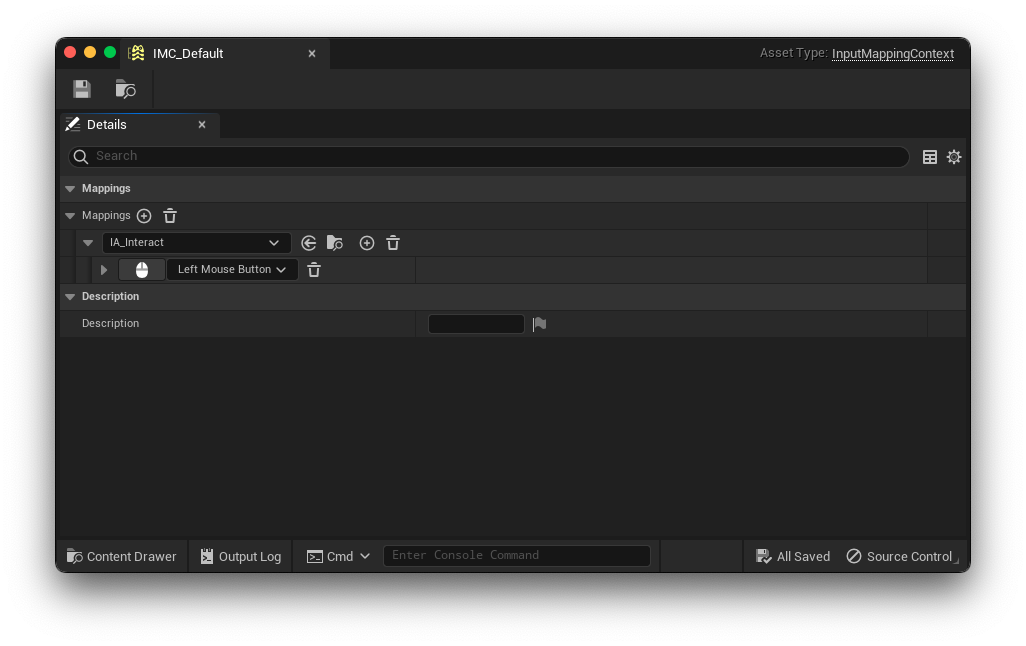
Configured my Input Mapping Context by assigning the Left Mouse Button to the AI_Interact Input Action:
And added the newly created IMC_Default context to the SetupPlayerInputComponent() function inside the AVRubiksCube class:
...
void AVRubiksCube::SetupPlayerInputComponent(UInputComponent* PlayerInputComponent)
{
	Super::SetupPlayerInputComponent(PlayerInputComponent);

	APlayerController* PC = Cast<APlayerController>(GetController());
	if (UEnhancedInputLocalPlayerSubsystem* Subsystem = ULocalPlayer::GetSubsystem<UEnhancedInputLocalPlayerSubsystem>(PC->GetLocalPlayer()))
	{
		Subsystem->ClearAllMappings();
		Subsystem->AddMappingContext(DefaultMappingContext, 0);
	}
}
...
Lastly, I moved the central part of the code that was in the tick to a function called Input_Interact() that was bound to the Triggered Event of the IA_Interact action and the reset code to an Input_EndInteract() function bound to the Completed Event. Both bindings were also done inside the SetupPlayerInputComponent() function from the AVRubiksCube class, as follows:
...
void AVRubiksCube::SetupPlayerInputComponent(UInputComponent* PlayerInputComponent)
{
	Super::SetupPlayerInputComponent(PlayerInputComponent);

	APlayerController* PC = Cast<APlayerController>(GetController());
	if (UEnhancedInputLocalPlayerSubsystem* Subsystem = ULocalPlayer::GetSubsystem<UEnhancedInputLocalPlayerSubsystem>(PC->GetLocalPlayer()))
	{
		Subsystem->ClearAllMappings();
		Subsystem->AddMappingContext(DefaultMappingContext, 0);
	}

	if (UEnhancedInputComponent* PlayerEnhancedInputComponent = Cast<UEnhancedInputComponent>(PlayerInputComponent))
	{
		if (InteractAction)
		{
			PlayerEnhancedInputComponent->BindAction(InteractAction, ETriggerEvent::Triggered, this, &AVRubiksCube::Input_Interact);
			PlayerEnhancedInputComponent->BindAction(InteractAction, ETriggerEvent::Completed, this, &AVRubiksCube::Input_EndInteract);
		}
	}
}
...
This way, if I’m not pressing anything, I don’t have any logic running as I had in the tick before.
If you want to go more in-depth in the Enhanced Input plugin using C++. Please, check this excellent five parts video tutorial by Druid Mechanics here.
It’s worth noting that there is also a pretty cool debugging feature from the Enhanced Input. If you type “showdebug enhancedinput” in the console:
showdebug enhancedinputUnreal will show handy information about the input system as an overlay in the game, like this:
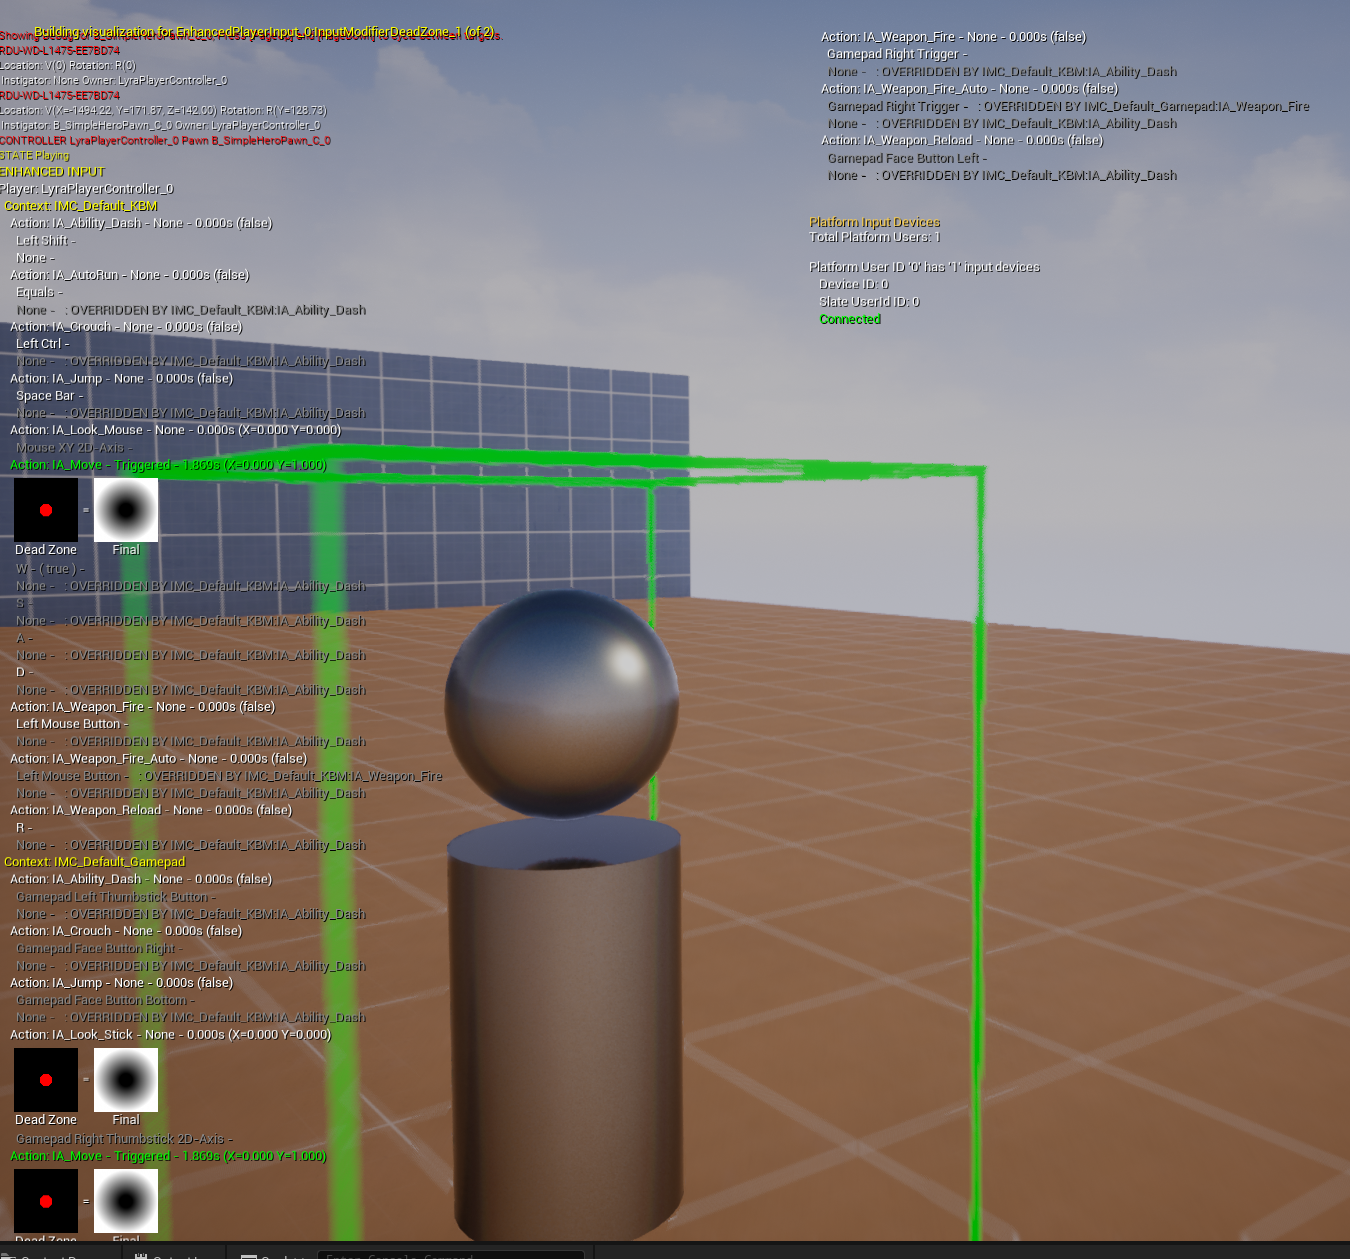
This way, you can track what is happening without adding breakpoints and prints to check which actions are triggered, their states, etc.
Start in Windowed Mode
Another little thing I changed in the project is that I forced it to run in windowed mode by default. For me, it felt pretty weird to have the huge cube in full-screen mode 🙂
You can do it easily in blueprints by changing the Game User Settings. This enables us to store user settings for a game (for example, graphics and sound settings), with the ability to save and load to and from a file. For example, you could add this to the BeginPlay event in Level Blueprint:
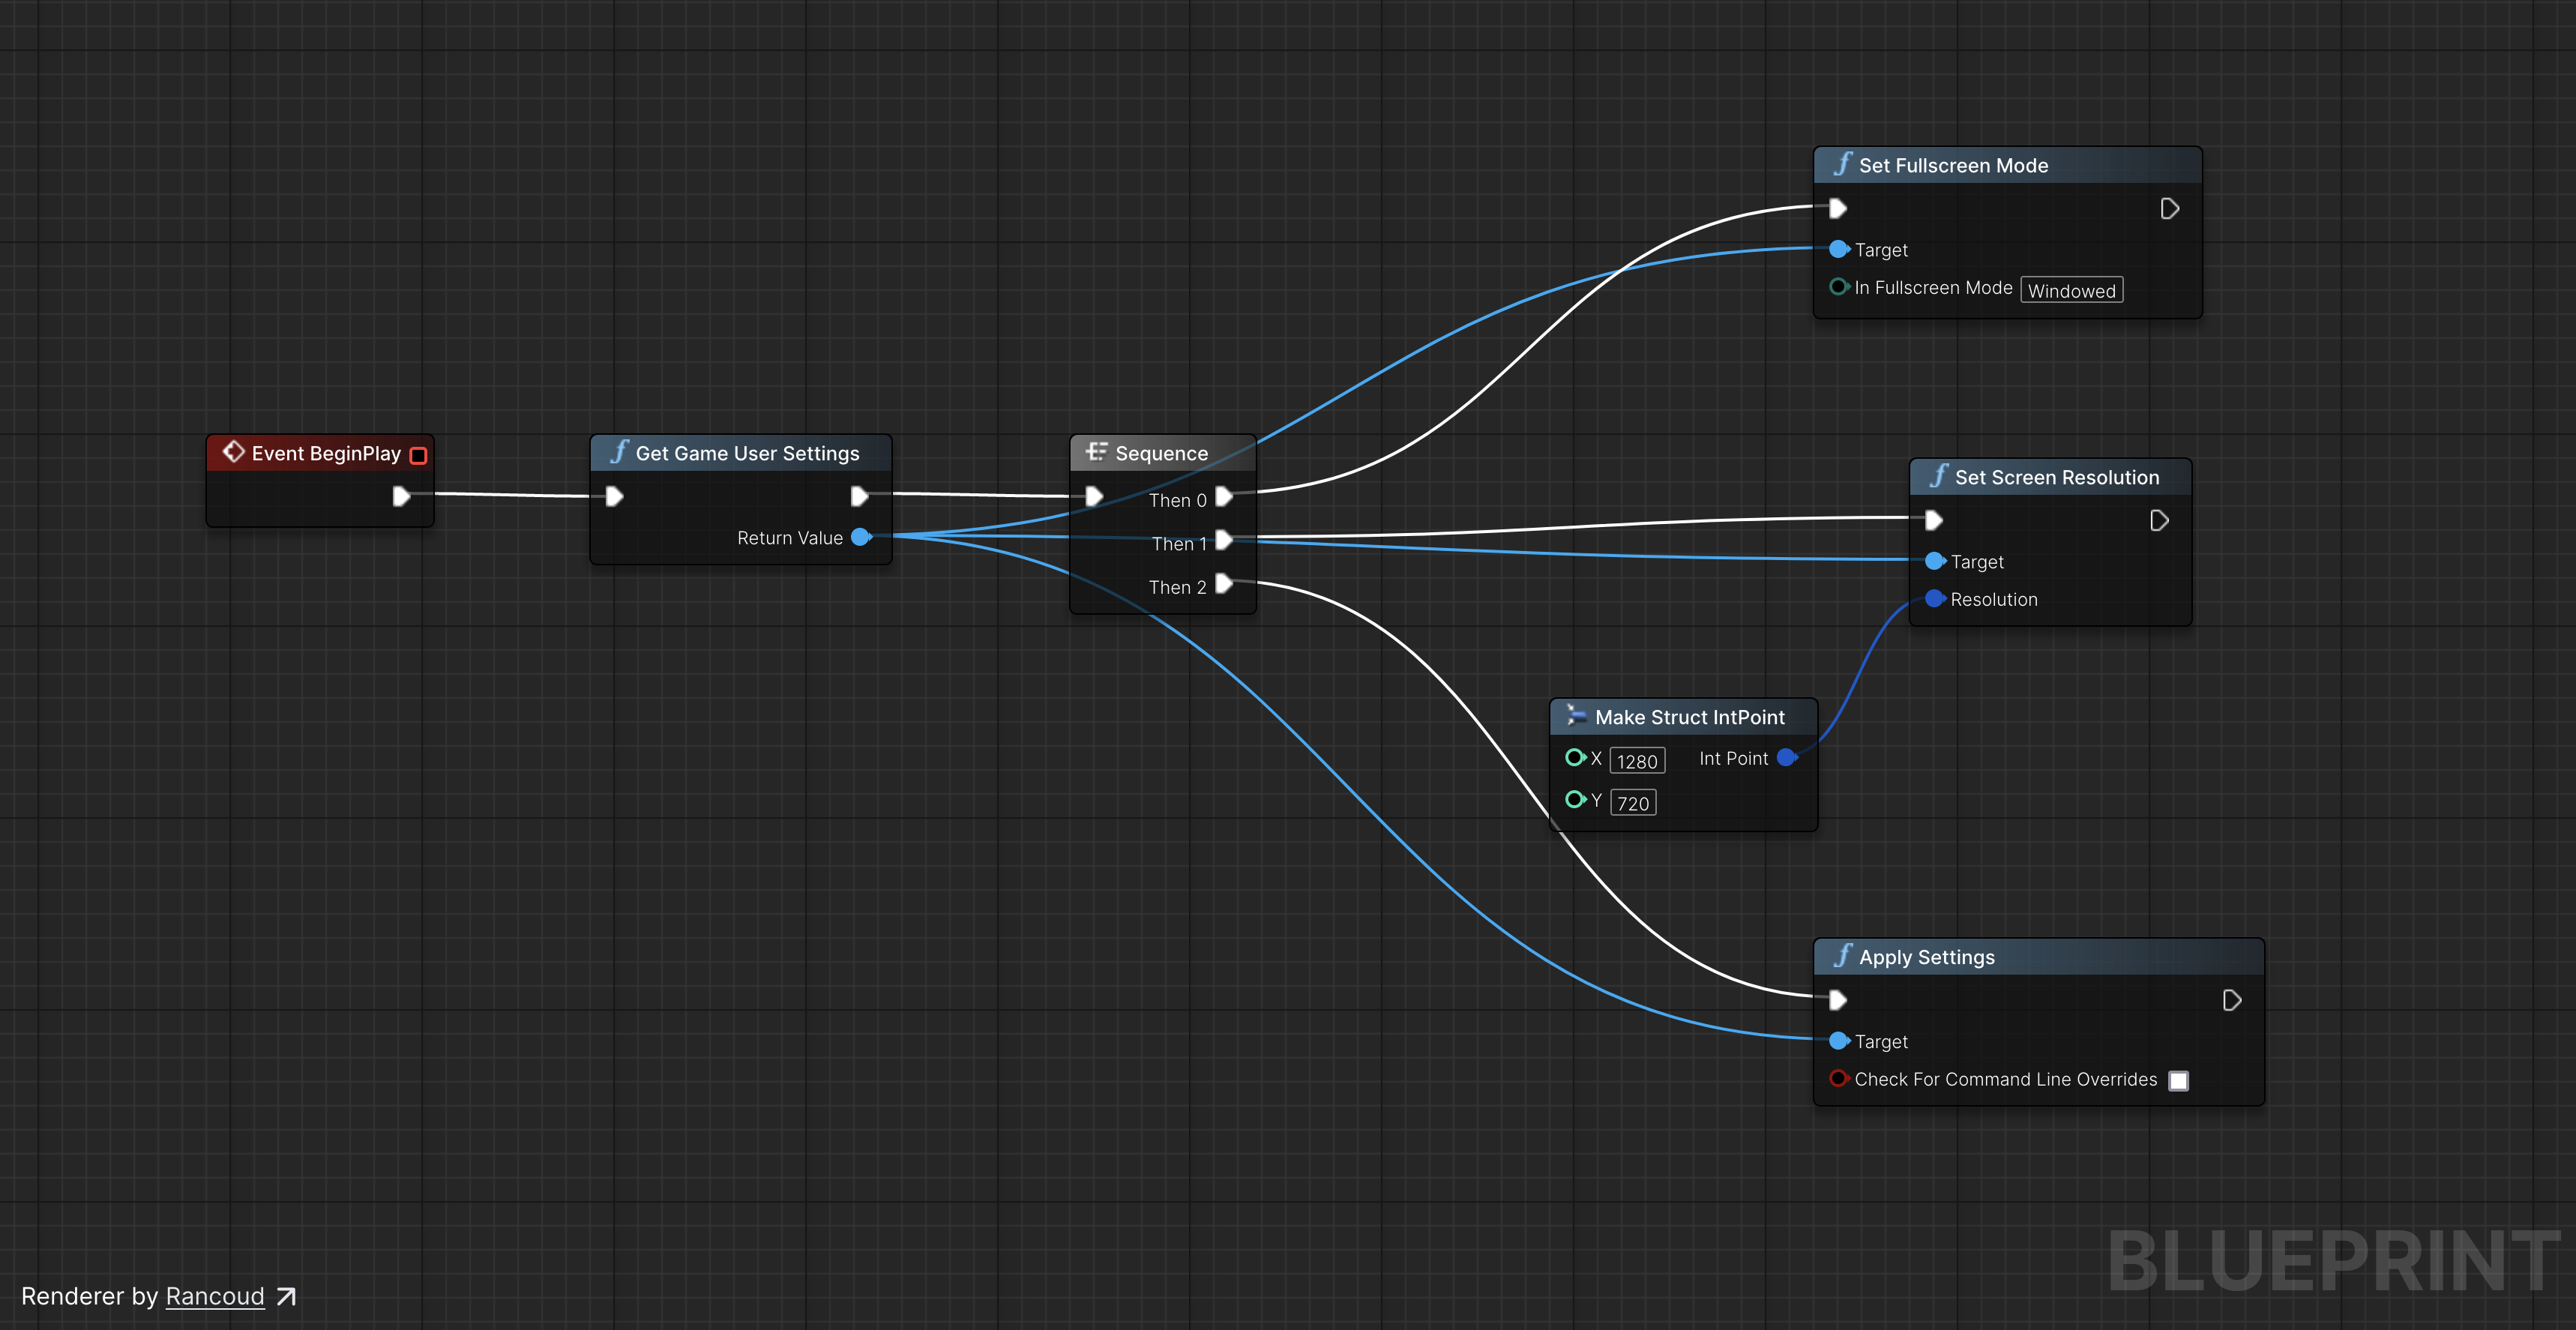
Remember that before the changes take effect, you must call the ApplySettings node.
However, I mostly use the Config files for those things. For example, you can create a DefaultGameUserSettings.ini file inside the project’s “Config” folder with the settings that you want to be used when the user launches the game:
[/Script/Engine.GameUserSettings]
ResolutionSizeX=1280
ResolutionSizeY=720
DesiredScreenWidth=1280
DesiredScreenHeight=720
FullscreenMode=2
Version=5
You can check more information about the available options in the documentation here.
And that should do the work.
Reducing the Build Size
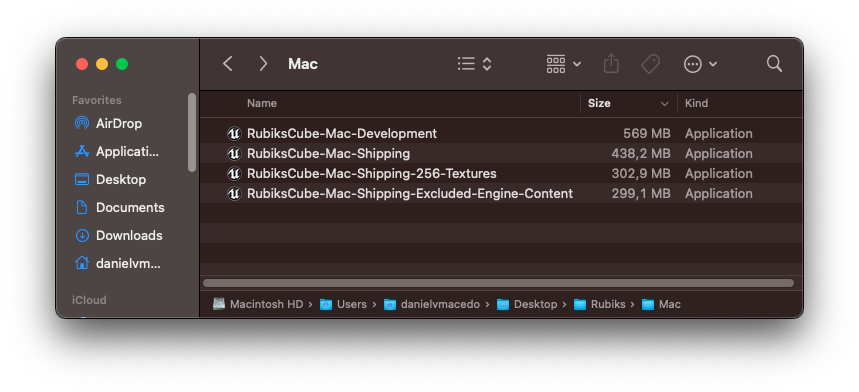
Managing build sizes can be especially daunting for newcomers to Unreal Engine. By default, Unreal Engine generates Development builds, including additional debugging information to help developers troubleshoot issues during development. However, this additional information can also make Development builds much larger than Shipping builds.
Switching from a Development build to a Shipping build can often significantly reduce build size. In fact, Shipping builds are optimized for performance and typically exclude unnecessary assets and debugging information.
So, switching to a Shipping build can be a quick and easy way to start if you want to reduce build size in Unreal Engine.
This project was reduced by 131MB after the switch:

Another thing you can easily do to reduce the build size is to reduce the texture sizes. Having a 2k or 4k texture in the project is very common. However, most of the time, you don’t have to use the texture in full resolution. For this project, I changed the maximum texture resolution for the HDR and the cube scratches to 256. Just by doing this, the Shipping build was reduced by another 136MB without any noticeable changes in the visuals:

There is a very handy video by Joe Dickenson on how to change texture sizes in Unreal 5 here.
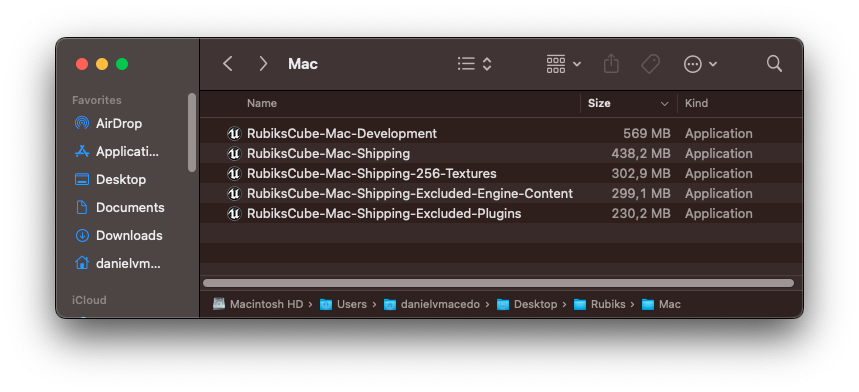
The Unreal documentation also recommends checking the option “Exclude editor content when cooking” to reduce the file size. By checking that option, the Shipping build was reduced by another 3MB:
And the last recommendation is to disable every single plugin you are not using in your project. You need to do this carefully because you might disable something you need, and the packaging process will fail. After disabling everything I could, the Shipping build was reduced by an extra 69MB:
However! You can still zip your project to share with someone. By doing that, you can still reduce an extra 140MB!
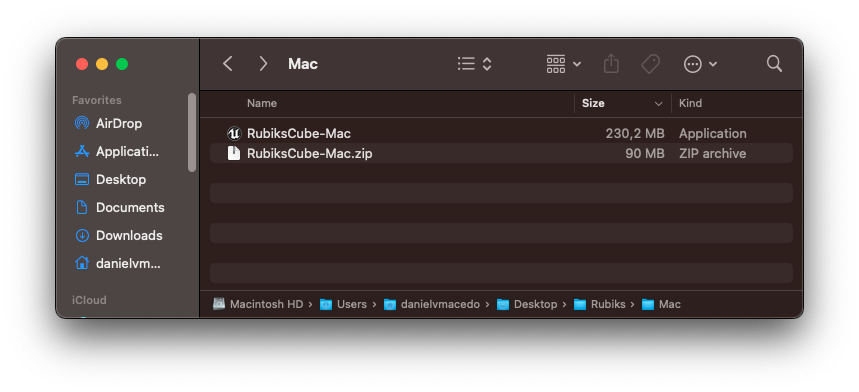
So, in the end, by following those simple steps, it was possible to reduce the packaged build by ~60% or ~85% (considering the zip version). That’s quite a lot!
I hope that it was helpful! The post is starting to get long… So, I will end this post here 🙂
Once again, thank you for reading, and I hope to have you back in the next post!
I might create dedicated posts about the Enhanced Input and How to reduce build sizes in the future. I feel that it’s totally worth it 🙂
Be First to Comment